Water Heater Installation Guide To Help You Through The Process.
Installing a water heater might seem challenging, but with some basic knowledge and the right tools, it can be a manageable DIY project. Here’s a simplified guide to help you through the process.
Safety First: Essential Precautions
Before you start, make sure to prioritize safety. Turn off the water supply to the old heater by closing the shut-off valves. If you’re working with an electric heater, cut the power by turning off the circuit breaker. For gas heaters, turn off the gas supply and ensure good ventilation in the area where you’re working.
Removing the Old Water Heater
To clear space for the new unit, you’ll need to remove the old heater. Attach a garden hose to the drain valve and direct it to a drain to empty the tank. After it’s drained, disconnect the water supply lines, electrical or gas connections, and the vent pipe. With some help, carefully move out the old heater.
Preparing for the New Installation
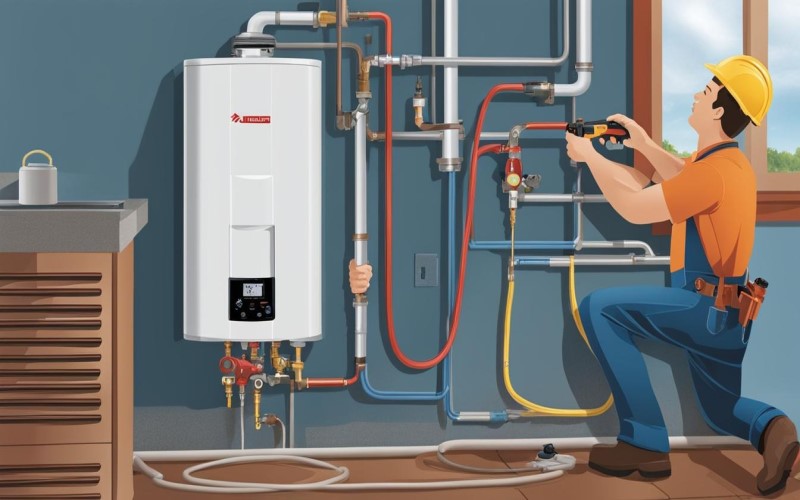
Place the new water heater in the chosen spot, making sure it’s level and stable. Install a drip pan underneath to catch any potential leaks. Attach the temperature and pressure relief valve (T&P) to the heater and direct the discharge pipe to a suitable outlet.
Connecting the Water Supply
Attach the flexible water supply lines to the heater’s inlet and outlet ports, using plumber’s tape to prevent leaks. Connect the other ends of these lines to the corresponding hot and cold water supply pipes. Tighten the connections securely, but avoid overtightening.
Electrical or Gas Connections
For electric heaters, connect the power supply according to the manufacturer’s instructions, ensuring it’s properly grounded. For gas heaters, connect the gas line, using pipe dope or Teflon tape on the threads. Always check the specific model’s manual for detailed instructions.
Filling the Tank and Checking for Leaks
Turn on the water supply to fill the tank. Check all connections for leaks. Open hot water faucets to release air from the system.
Final Adjustments and Testing
Once the tank is full, set the desired water temperature on the thermostat. Test all hot water faucets to ensure everything is working correctly. Keep an eye on the heater for any leaks or unusual noises during its initial operation.
Additional Considerations
Local building codes may vary, so make sure you’re in compliance with these regulations. If you’re unsure about any part of the installation, it’s a good idea to consult a professional plumber. Regular maintenance, such as flushing the tank and inspecting components, is important for keeping your water heater in good shape.
Installing Multiple Tankless Water Heaters
Can you run two tankless water heaters together? Absolutely, but careful planning is essential. If your home has high hot water demands or multiple levels, installing two tankless water heaters might be a smart choice. Running two units together requires careful planning. You can set them up in parallel to increase your hot water capacity or in series to raise the water temperature. Each approach has its benefits, but it’s crucial to size and balance the units correctly to avoid efficiency problems. For the best results and to ensure everything runs smoothly, it’s a good idea to consult a professional plumber who can guide you on the best setup for your needs.
By following these steps and staying safe, you can successfully install a new water heater. If you face any issues or if the installation seems too complex, don’t hesitate to seek professional help.


