Window Film Wonders: Boost Security, Cut Costs, and Elevate Your Home
When it comes to enhancing your home in Winnetka, IL, window film stands out as one of the most versatile and beneficial upgrades you can make. Whether your goal is to improve security, protect your interiors from the harsh Midwestern sun, or add a touch of style to your space, window film offers solutions that go far beyond traditional glass treatments. Let’s explore how residential window tinting can transform homes in Winnetka by providing security, comfort, and aesthetic appeal tailored to your local needs.
1. Enhanced Home Security
One of the most significant advantages of window film is its ability to reinforce your home’s security. By applying home window security film, you create a strong barrier that makes it harder for intruders to break in. The film holds shattered glass together, slowing down potential burglars and reducing the likelihood of injury from broken glass.
Unlike other security measures, such as bars or shutters, window film doesn’t obstruct your view or detract from your home’s design. It’s a discreet yet effective solution for residential window protection, giving you peace of mind without compromising the aesthetic appeal of your property.
2. Protection from Harmful UV Rays
The sun can cause considerable damage to your interiors over time. Fading furniture, discolored flooring, and even skin exposure to harmful ultraviolet (UV) rays are common concerns. Residential window tinting provides a shield against up to 99% of harmful UV rays, helping to preserve your belongings and protect your family’s health.
Window film not only reduces the harmful effects of UV rays but also minimizes glare. This creates a more comfortable environment, especially in rooms with large windows, making activities like watching TV or working on a computer easier.
3. Energy Efficiency and Cost Savings
Another compelling benefit of window tint is its ability to enhance your home’s energy efficiency. By reducing heat transfer through your windows, tinting helps maintain a consistent indoor temperature, lessening the strain on your heating and cooling systems.
During summer, tinted windows keep your home cooler by blocking solar heat, while in winter, they retain warmth, reducing energy bills year-round. Over time, this energy efficiency translates to significant cost savings and a reduced carbon footprint.
4. Increased Privacy Without Sacrificing Natural Light
Privacy is a crucial factor for any homeowner. Residential window tinting offers an effective way to increase privacy without losing access to natural light. Tinted films can prevent outsiders from seeing into your home during the day while still allowing you to enjoy the beauty of sunlight streaming through your windows.
For added customization, decorative films are also available, allowing you to choose patterns or frosted finishes that enhance your home’s style while ensuring privacy.
5. Stylish Aesthetic and Customization
Window films are not just functional; they can also elevate your home’s look. Decorative films come in a variety of patterns, textures, and colors, making it easy to create a unique style for your living spaces. Whether you prefer a sleek, modern design or something more classic, there’s a film to match your taste.
This versatility makes window film an excellent choice for enhancing curb appeal or adding personality to interior spaces. It’s a simple, cost-effective way to upgrade your home’s design without undertaking extensive renovations.
6. Added Safety During Emergencies
In addition to home window security, window film plays a vital role in protecting your family during natural disasters. Severe weather events like hurricanes or strong winds can send glass shards flying, posing serious safety risks.
While some brands, such as 3M security films, are popular for their durability, many alternatives offer comparable performance. These films hold glass in place during impact, reducing the chance of injuries and making cleanup easier after an incident.
7. Reduced Maintenance and Longevity
Window films can also prolong the life of your windows by providing an extra layer of protection against scratches, wear, and environmental damage. This means you’ll spend less time and money on repairs or replacements in the long run.
Furthermore, cleaning windows with film is typically easier. Most films are designed to resist fingerprints, smudges, and dirt, making upkeep a breeze and ensuring your windows stay pristine for years to come.
Choosing the Right Window Film
With so many options available, it’s essential to choose the right type of window film to suit your needs. Whether you’re prioritizing home window security, energy efficiency, or aesthetics, consulting a professional, like Winnetka IL Window Security Film and Design, is the best way to ensure you get the desired results.
While some films like 3M security films are well-known, other brands offer similar levels of protection and benefits at varying price points. Be sure to compare your options and choose a product that aligns with your priorities and budget.
Step-by-Step Guide: How to Apply Window Film to Your Windows
If you’re in Winnetka, IL, and considering installing window film, you may be surprised to learn that it’s a manageable DIY project. While professional installation guarantees precision, applying window film yourself can be a cost-effective and rewarding task. Follow this step-by-step guide to achieve a polished, professional look.
What You’ll Need:
- Window film of your choice
- Measuring tape
- Utility knife or sharp scissors
- Spray bottle filled with soapy water (a few drops of dish soap in water)
- Squeegee or credit card wrapped in a microfiber cloth
- Microfiber cleaning cloth
- Glass cleaner
Step 1: Choose the Right Window Film
Select a window film that matches your goals. Are you looking for added privacy, home window security, residential window protection from UV rays, or a decorative touch? Many options are available, so pick one that suits your needs and the aesthetics of your Winnetka home.
Step 2: Measure Your Windows
Use a measuring tape to measure the width and height of each window you plan to tint. Add an extra inch to each side to ensure a margin for error. This allows you to trim the film neatly during application.
Step 3: Prepare Your Workspace
Work in a clean, dust-free area to prevent debris from getting trapped between the film and the glass. Lay your window film flat on a clean surface, with the protective backing facing up.
Step 4: Clean the Windows
Thoroughly clean your windows with glass cleaner and a microfiber cloth. Ensure no dust, grease, or residue remains, as even small particles can create bubbles under the film. Dry the glass completely before moving to the next step.
Step 5: Cut the Film to Size
Using your measurements, cut the window film slightly larger than your window pane. This extra size will help you position the film correctly before trimming it for a perfect fit.
Step 6: Wet the Window Surface
Fill a spray bottle with soapy water and spray it generously onto the window surface. The soapy water helps the film adhere smoothly and allows you to adjust its position during installation.
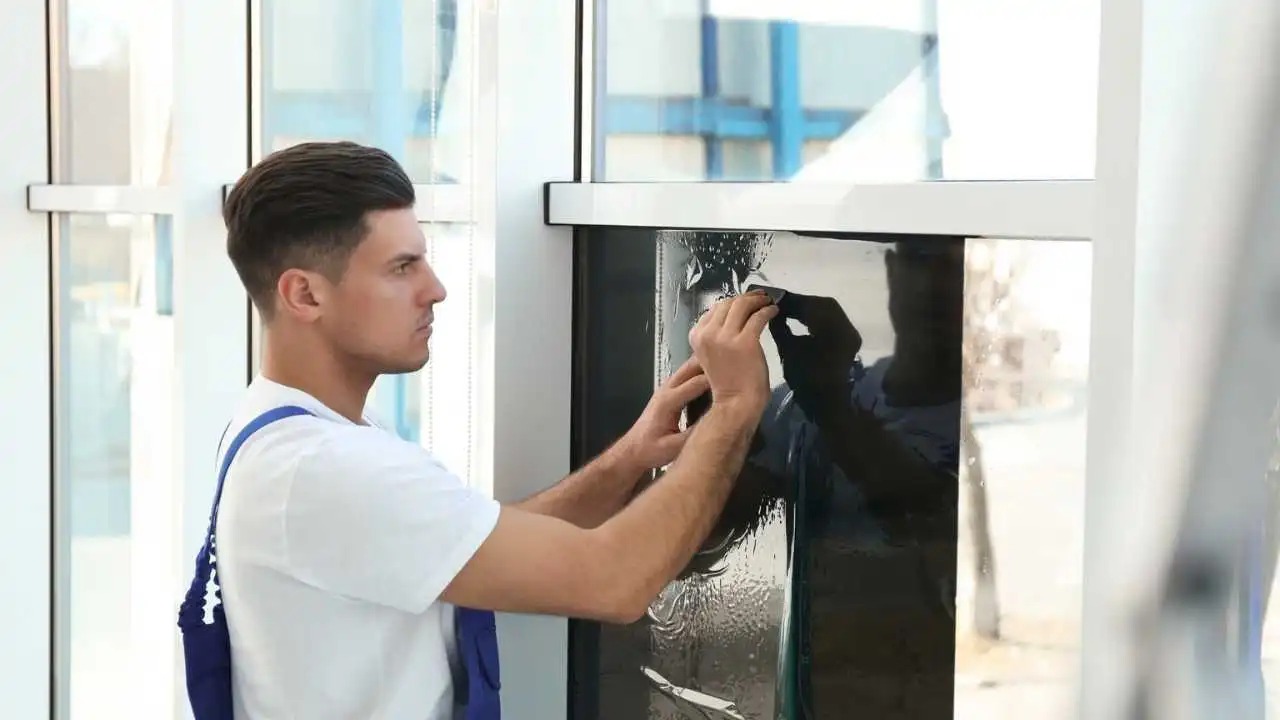
Step 7: Peel Off the Backing
Carefully peel the backing off the window film to expose the adhesive side. Be cautious to avoid creases or dirt sticking to the adhesive. If you’re working with a large piece of film, having a helper can make this step easier.
Step 8: Position the Film
Place the adhesive side of the film onto the wet window surface. The soapy water will allow you to slide the film into the correct position. Align the edges of the film with the window pane, ensuring it covers the entire glass.
Step 9: Smooth Out the Film
Using a squeegee or a wrapped credit card, start at the center of the film and work outward to remove air bubbles and excess water. Apply firm, even pressure to ensure a smooth finish. Take your time to eliminate all wrinkles and bubbles.
Step 10: Trim the Excess Film
Once the film is securely in place, use a utility knife or sharp scissors to trim the edges neatly. Follow the edge of the window frame for a precise cut.
Step 11: Final Touches
Spray a little more soapy water on the film’s surface and use the squeegee to ensure it’s fully adhered to the glass. Wipe away any remaining water or soap with a clean microfiber cloth.
Step 12: Let It Set
Allow the film to cure for 24 to 48 hours before cleaning or touching it. During this time, the adhesive will fully bond to the glass, and any remaining small bubbles will usually disappear.
If you find the process tricky or want flawless results, call in the experts from Winnetka IL Window Security Film and Design for professional residential window tinting. Professionals ensure a seamless installation, whether for security, decoration, or sun protection.
Final Thoughts
Window film is a practical, cost-effective solution that enhances security, boosts energy efficiency, and adds style to your home. From residential window protection to increased privacy and safety, the benefits of this upgrade are far-reaching.
Whether you’re looking to safeguard your home, reduce sun damage, or enjoy a modern aesthetic, residential window tinting has you covered. With the right choice, you can enjoy all these advantages while increasing the comfort and value of your property.
If you haven’t yet explored the benefits of window film, now is the time to consider this simple yet transformative improvement. Let it brighten your home, protect your loved ones, and offer the peace of mind you deserve.